


We respect your personal privacy
This website uses first and third party cookies to personalise your experience, analyse web traffic data, and optimise performance. We never sell your data to third parties. Privacy Policy.

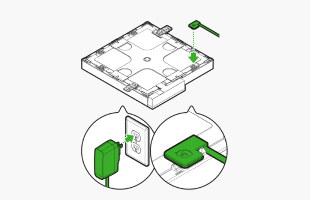
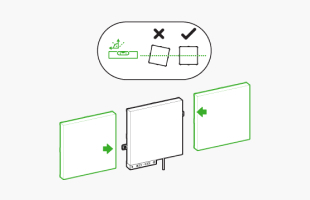
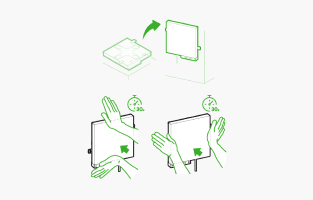
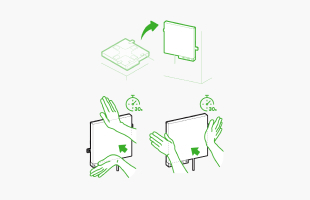
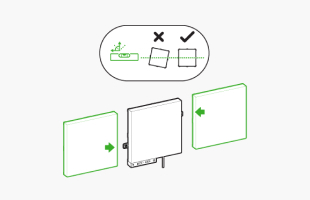
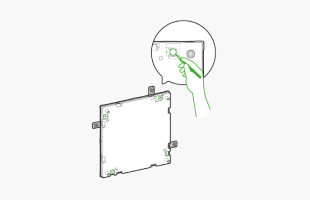
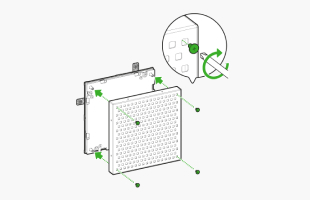
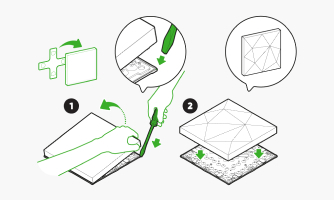
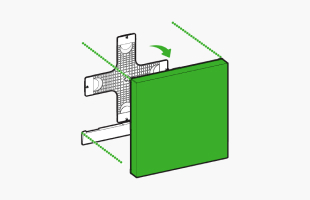
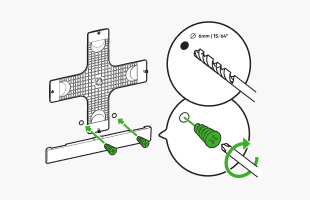
Before mounting your first panel, make sure the round end of the tape overhangs the opening in the mounting plate. This will allow you to safely remove them later from the wall.
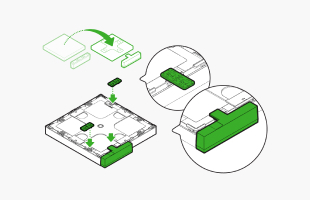
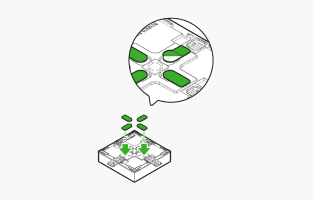
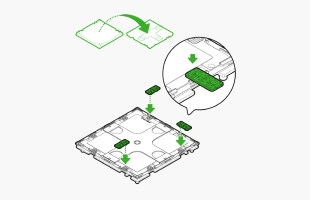
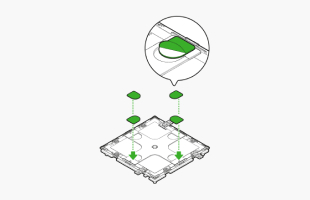
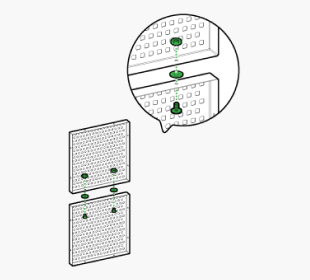
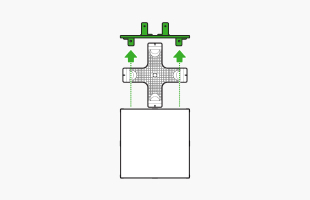
Squares have 2 linker slots per side, allowing for offset connections.
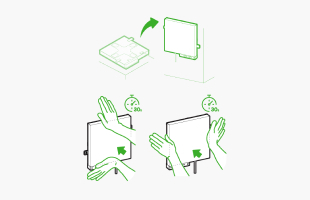
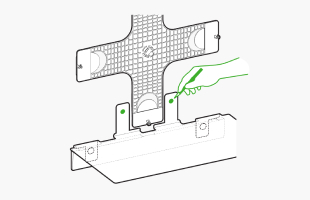
To uninstall your Blocks Panels, remove the panel, leaving the mounting plate on the wall. Pull the tape from under the tabs very slowly so the tape stretches and does not snap. The mounting plate will release from the wall once all tape has been removed.
To uninstall your Blocks Panels, remove the panel, leaving the mount plate behind. Pull the tape from under the tabs very slowly so the tape stretches and does not snap. The mounting plate will release from the wall once all tape has been removed.

Important
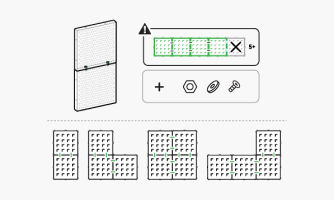
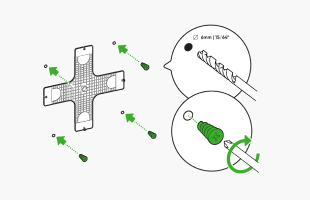
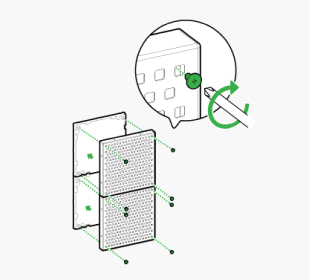
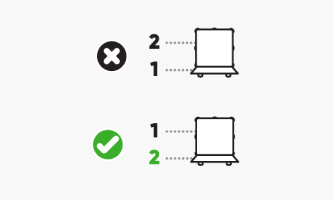
You can have multiple light pegboards in one layout, but we suggest a max grouping (cluster) of 4 for a more stable and secure installation.
A single pegboard has a weight bearing capacity of 3kg (6.6lbs).
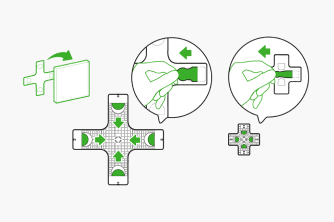
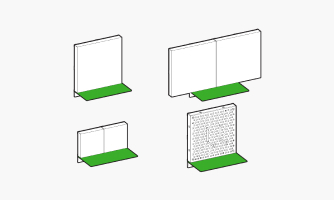
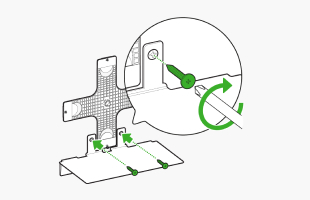
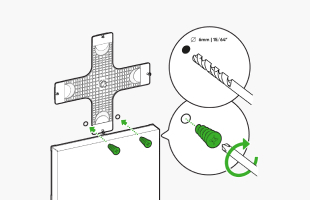
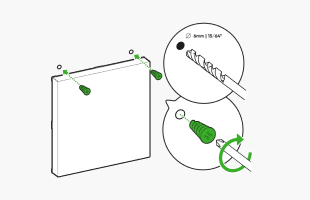
You can also reduce the number of screws on your wall by only screw mounting the outer corners of your pegboard cluster. This is only applicable for smaller clusters (max 4).
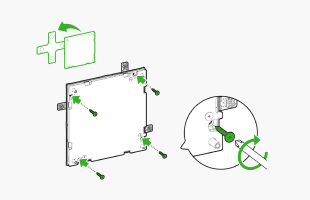
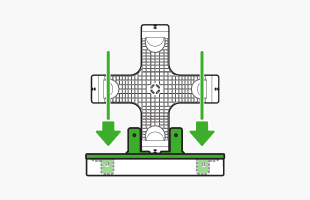
Here are some examples of pegboard clusters and the corners (marked in green) that would need to be screwed into the wall.
If you have more than 5 pegboards in your layout, we suggest spreading them out or grouping them in smaller clusters (max 4).
If you need to have 5 or more pegboards in a cluster, you must screw-mount all four corners of each pegboard.
Important
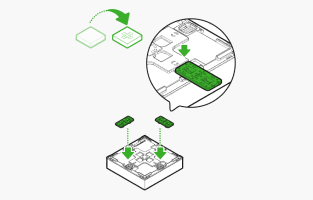
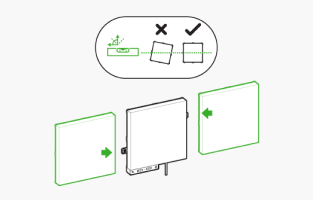
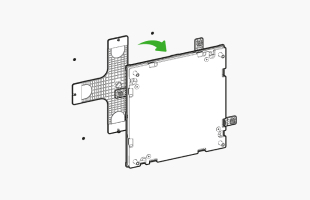
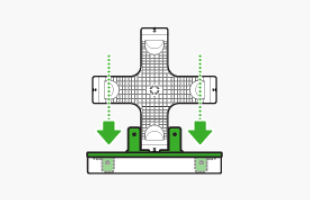
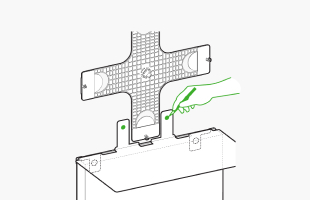
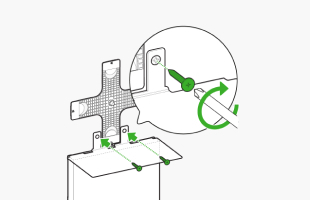
Ensure that all linkers that are needed for your layout are securely snapped into the pegboard as it will be difficult to add more later.
Skip to Step 3 if you do not have pegboard clusters in your layout.
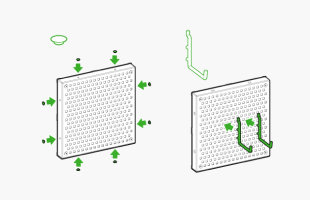
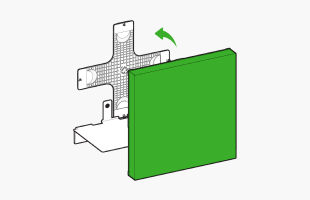
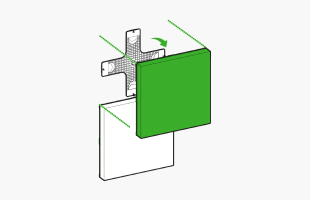
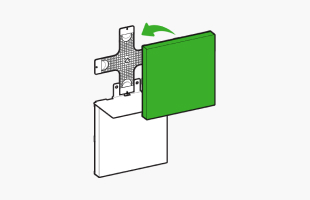
The difference between Squares and Textured Panels is just in the diffuser cover!
To set up your Textured Panels, follow the same installation steps as with Squares.
Rotate your Textured Squares to change up the orientation of the 3D design.
Optional: Swapping Diffusers
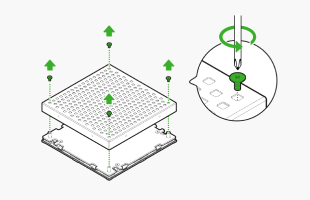
If desired, you can swap the diffusers between Squares and Textured Square Panels. Look for the small notch at the corner of the panel, and using a flathead screwdriver, pull the diffuser off, and replace it with the diffuser of your choice.
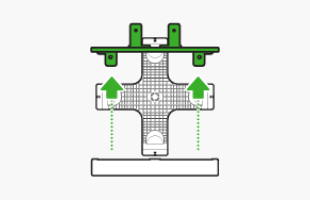
To uninstall your Blocks Panels, remove the panel, leaving the mounting plate on the wall. Pull the tape from under the tabs very slowly so the tape stretches and does not snap. The mounting plate will release from the wall once all tape has been removed.
Important
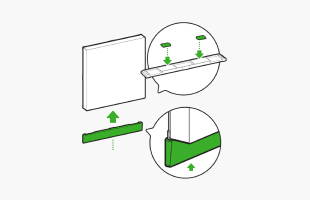
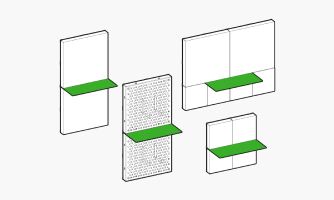
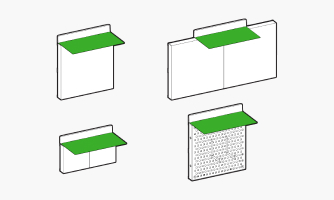
Choose the appropriate shelf installation method based on where your shelf sits in your layout relative to other Blocks panels.


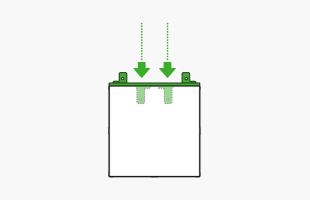
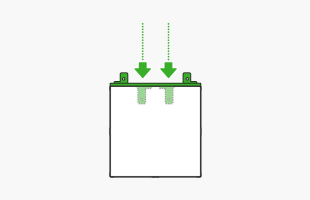
For shelf installations at the bottom of a layout. Use this method if no panels will be placed underneath your shelf.
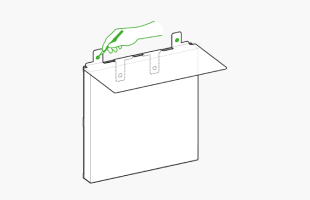
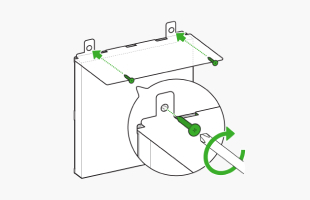
For shelf installations in between panels. Use this method if there will be panels installed above and below your shelf.
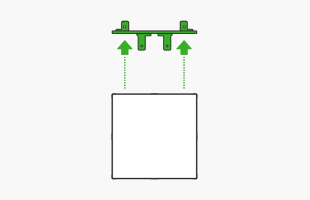
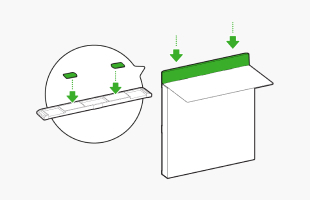
For shelf installations at the top of a layout. Use this method if no panels will be placed on top of your shelf.
We think there might be a better match for your location and language :) You can set these below for local prices and the fastest delivery. Wir glauben, dass es für Ihren Standort und Ihre Sprache eine bessere Übereinstimmung geben könnte :) Diese können diese unten einstellen, um lokale Preise und die schnellste Lieferung zu erhalten. Nous pensons qu’il pourrait y avoir de meilleurs résultats correspondant à votre emplacement et à votre langue :) Vous pouvez les préciser ci-dessous pour avoir une idée sur les prix locaux et les meilleurs délais de livraison. Kami pikir mungkin ada kecocokan yang lebih baik untuk lokasi dan bahasa Anda :) Anda dapat mengaturnya di bawah ini untuk harga lokal dan pengiriman tercepat. Potrebbe esserci una corrispondenza migliore per la località e la lingua da te scelta :) Impostale qui sotto per i prezzi a livello locale e una consegna più rapida. お客様の地域や言語によりピッタリのウェブページをお選びください :)以下から、現地の価格や最短の配信をご設定いただけます。 귀하의 위치와 언어에 더 적합한 매치가 있으리라 생각합니다. 지역 금액 및 가장 빠른 배송을 위해 귀하는 위치와 언어를 아래에서 설정할 수 있습니다. เราพบว่ามีตัวเลือกที่ดีกว่าสำหรับที่อยู่และภาษาของคุณ คุณสามารถตั้งค่าข้อมูลเหล่านี้ด้านล่างสำหรับราคาท้องถิ่นและเวลาจัดส่งที่เร็วที่สุด Chúng tôi nghĩ rằng có thể có sự phù hợp tốt hơn cho vị trí và ngôn ngữ của bạn :) Bạn có thể đặt những điều này bên dưới để có giá địa phương và giao hàng nhanh nhất. 使用自己的位置和語言肯定更順手吧:)您可以在下方設定這些選項,並取得當地價格與最快的交付。